Earth Day is celebrated each year in April, and the date is coming up quick. The movement began in 1970, and, every year since, people spanning the globe have come together to help take care of the planet. While habits like recycling and minimizing consumption are important to practice year-round, the annual holiday is the perfect time to do something extra or help kids understand the importance of protecting our planet. If you are looking for a great way to involve your family in the Earth Day festivities, check out these eco-friendly crafts for kids.
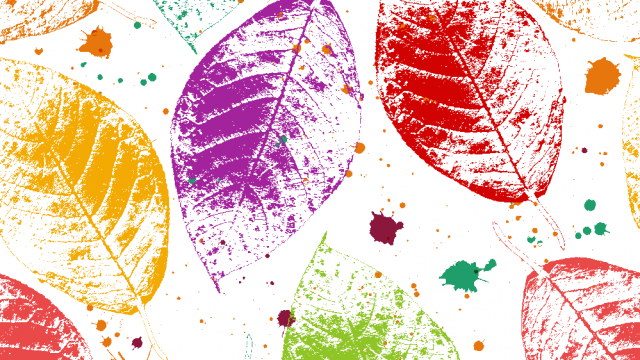
Leaf Prints
Making leaf prints on newspaper or wooden materials is a fun craft that is perfect for young children. It can also be performed on blank t shirts for a design that kids can wear and show off their eco-friendly enthusiasm to their friends. All you need is an assortment of leaves, acrylic paint, newspaper, saucers and a plastic soda bottle. Start by taking a walk around the yard or in the woods to collect a variety of different types of leaves. For older children, this is a good opportunity to try to identify different types of leaves and the trees they came from.
When you return home, pour a small amount of acrylic paint in each saucer. A small plate will work as well. Spread a sheet of newspaper on a large, flat surface. Carefully dip each leaf in pain, then place it painted side down on the newspaper. Repeat this until several leaves in varying colors are arranged on the newspaper.
Cover the entire project with another large sheet of newspaper. Carefully roll the soda bottle over the top. Remove the top layer of newspaper, and then help your child carefully remove the leaves. When you’re finished, you and your child will have a colorful set of leaf prints to display.
Potpourri Pine Cones

Help your little ones make your home smell amazing by making potpourri pinecones. This project is appropriate for kids who are preschool-age and older, and it’s easy to complete in an afternoon. You will need pinecones; ½ cup of water; ½ cup of glue; cinnamon, cloves, or other yummy-smelling spices; a paintbrush; and a mixing bowl, a spoon, and a plastic bowl for each spice.
Go for a walk in the woods and help your child select a variety of pinecones. Larger ones are better than tiny ones. When you return home, protect the work area using newspapers. Combine the glue and water in a mixing bowl and put each spice in its own plastic bowl. Use the paintbrush to coat an entire pinecone in the glue/water mixtures. While the glue is still wet, roll the pinecone in the spices, making sure to cover the entire surface. Repeat with all your pinecones.
When you’re finished, set them aside to dry for several hours or overnight. Once dried, the fragrant pinecones can be displayed in a decorative bowl or basket.
Recycled Wiggle Worm Toy
Who says fun toys have to be expensive? Help your child make their own using recycled materials you already have lying around your house. You will need a foam plastic egg carton, cardboard tubes from toilet paper, twine or string, tape, paint, and paintbrushes.
Start by painting the cardboard tubes in different colors and allowing them to dry. Cut two sections from the foam egg carton. These will be used for the worm’s head and tail. Cut a 2.5-foot length of string. Help your child thread the string first through one of the pieces of the egg carton, and then through the cardboard tubes and the other piece of egg carton. Leave at least a foot of string at the head end for pulling. Tie knots at both ends and secure the string on the tail end using tape. Decorate the face. Your child will love pulling the worm along and watching it roll and wiggle about.
Painted Rocks
Rocks are the perfect canvas for expressing your creativity, and painting them is a project that kids of all ages can enjoy. Thanks to the popular activity of hiding decorated rocks for others to find, this project is also fun for adults.
To get started, you only need three things: rocks, paints, and brushes. Smooth rocks work better for this project than rougher ones, but rocks with unique shapes work well for creating certain designs. Use smooth, round stones to create a family of ladybugs, or use larger stones to create gratitude stones to present to family and friends. Your creativity is the only limit when it comes to this project.
Acorn Frame
An acorn frame is an easy, eco-friendly project that is perfect for gift-giving. You only need a few basic supplies: enough acorn tops to cover a frame, white craft glue, and a wooden picture frame.
Start by drying your acorn tops. Place them on a cookie sheet, and then bake them in a preheated 225-degree oven for 40 minutes. This removes excess moisture and ensures that the acorn tops will adhere properly. Remove them from the oven and allow them to cool. Apply white glue to the frame generously and cover with acorn tops. Work in sections until the entire frame is covered. Once you’ve covered the frame, use glue to fill in any gaps between the acorns. Let dry overnight.
Once dry, you can paint the acorn tops or apply glue and glitter for a more colorful, decorative finish. You could also add a twine ribbon to give it a bit more style.
Magazine Bead Bracelets
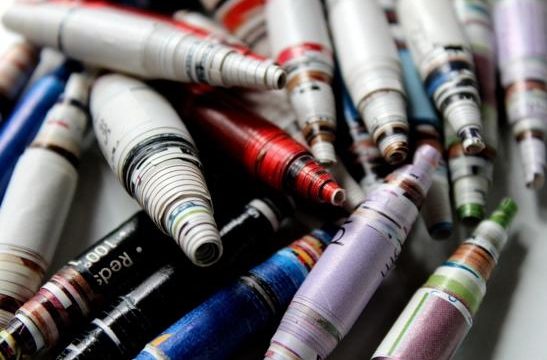
If you have a bunch of magazines lying around, you have the perfect material for making beautiful beads. Magazine bead bracelets are easy to make, and it is a project that is enjoyable for both younger kids and teens. Gather up these supplies to get started: magazines, white glue, scissors, straw, and pipe cleaners or yarn.
Cut strips out of colorful magazine pages. The size doesn’t need to be exact, but the width should average between .5 to 1.5 inches. Roll a strip of magazine paper firmly around the straw. After you wrap it around one full time, put a line of glue down the strip’s inside length. Carefully roll the strip around the straw. If a bit of glue squeezes out, that’s okay! When you’ve wrapped the entire strip, rub excess glue around it to secure the end. Slide the bead off the straw. Wipe glue residue off the straw and repeat until you have enough beads for your bracelet. Allow beads to dry completely on a nonporous surface, and then string them on a pipe cleaner or a piece of yarn to make a bracelet.